The biggest mistake in diamond buying is paying a premium for a VVS or VS1 grade when a well-chosen “imperfect” SI diamond can look identical to the naked eye.
- The location of an inclusion is far more critical than the clarity grade itself; a flaw hidden near the edge is invisible, while one on the central table is a deal-breaker.
- Step-cut diamonds like emerald cuts are less forgiving and demand higher clarity, whereas brilliant cuts are excellent at masking minor flaws.
Recommendation: Always demand a GIA or IGI certificate and learn to read its clarity plot to find a high-value, “eye-clean” stone that prioritizes visual performance over on-paper perfection.
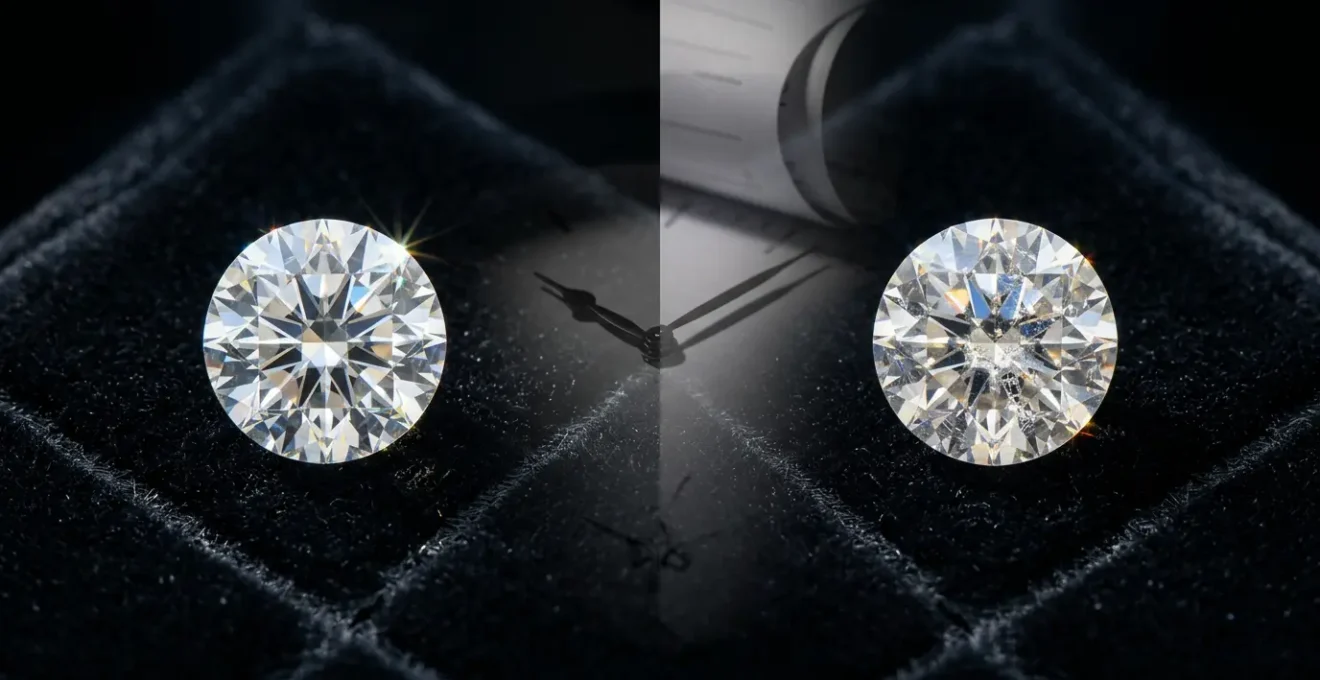
You’re staring at two diamonds that look identical. One is a VS1, the other an SI1, and there’s a significant price difference between them. The common advice whispers in your ear: “buy the highest clarity you can afford.” This leads many pragmatic buyers into a trap, forcing them to choose between a smaller, “cleaner” stone and a larger one with a supposedly inferior grade. It’s a frustrating dilemma, born from the opaque world of VVS, VS, and SI clarity ratings that seem designed to confuse rather than clarify.
But what if the entire premise is flawed? What if the secret to finding a visually perfect diamond has little to do with the grade on the certificate and everything to do with understanding an inclusion’s “zip code”? The truth that seasoned gemologists know is that you don’t pay for a grade; you pay for what you can—or cannot—see. It’s not about avoiding inclusions altogether, but about finding a stone where they are cleverly hidden from view, making them irrelevant to its beauty.
This guide rejects the notion that a higher grade automatically equals a better diamond for your money. Instead, we’ll arm you with a value-focused consultant’s perspective. You’ll learn why a black crystal in the center is a non-starter, how an emerald cut’s “hall of mirrors” exposes every flaw, and why an SI2 can be a brilliant buy for earrings but a disaster for a ring. Forget paying for invisible perfection; it’s time to master the art of the intelligent compromise.
This article provides a detailed breakdown of the critical factors that determine a diamond’s true visual quality, beyond its simple clarity grade. Explore the following sections to become a smarter, more confident buyer.
Summary: The Savvy Buyer’s Guide to Diamond Clarity and Value
- Why Should You Avoid Black Crystal Inclusions in the Centre of a Stone?
- Why Do Emerald Cut Diamonds Need Higher Clarity Than Round Cuts?
- Is an “Eye-Clean” SI2 Diamond a Myth or a Smart Buy?
- The Error of Accepting an Inclusion on the Table vs the Girdle
- Why Can’t You Drop to SI2 Clarity for Earrings But Not for Rings?
- The Mistake of Buying “Strong Blue” Fluorescence Without Seeing It First
- Why is a 3-Prong “Martini” Setting Riskier Than a 4-Prong Basket?
- Why Should You Demand a GIA or IGI Certificate for Diamonds Over 0.50ct?
Why Should You Avoid Black Crystal Inclusions in the Centre of a Stone?
Not all inclusions are created equal. While many are benign—tiny white “pinpoints” or “clouds” invisible to the naked eye—a black crystal inclusion is a different beast entirely. Think of the top of your diamond, the table, as its prime visual real estate. A black crystal parked right in the middle is like a permanent, unremovable speck of dust that your eye will be drawn to every single time. It acts as a “light sink,” absorbing the light that should be reflecting back to create sparkle and actively detracting from the diamond’s brilliance.
The problem is magnified by the diamond’s own facets. The pavilion facets at the bottom of the stone are designed to act like mirrors. A single, centrally located black crystal can be reflected multiple times throughout the stone, creating the illusion of several dark spots. What was one small flaw now appears as a distracting pattern, effectively downgrading the diamond’s appearance far beyond its official SI or I1 grade. While a white or transparent inclusion might blend in, a black one creates a high-contrast focal point that screams “imperfect.”
This is why a diamond’s clarity plot on its certificate is your best friend. It maps the location of the grade-setting inclusions. If you see the symbol for a crystal in the center of the table diagram, it’s a major red flag. For a pragmatic buyer, paying for a stone with such a visible flaw—no matter how attractive the price—is a poor investment in beauty. The goal is “eye-clean,” and a central black crystal almost never qualifies.
Your Action Plan: Identifying Problematic Black Crystal Inclusions
- Examine the GIA or IGI certificate’s clarity plot to locate the position of the grade-setting inclusion.
- Use a 10x loupe or high-definition online imagery to assess if the inclusion appears as a ‘light sink’ that blocks reflection.
- Rock the diamond under different lighting angles to see if the inclusion multiplies its reflection in the pavilion facets.
- Compare the inclusion’s size to a pinpoint reference; anything larger than 0.2mm in the center is a cause for concern.
- Assess the inclusion’s relief: high-relief black crystals are far more visible to the naked eye than low-relief white or transparent ones.
Why Do Emerald Cut Diamonds Need Higher Clarity Than Round Cuts?
If a round brilliant diamond is all about fiery sparkle, an emerald cut is about elegant, icy clarity. This fundamental difference in personality comes from their faceting structure, and it has massive implications for the clarity grade you can get away with. A round cut has 58 brilliant-style facets designed to chop up light and reflect it in a dazzling disco-ball effect. This intense sparkle is incredibly effective at masking small inclusions, making an eye-clean SI1 or even some SI2 diamonds a smart, high-value purchase.
An emerald cut, however, is a “step cut.” Its facets are long, straight, and parallel, creating a “hall of mirrors” effect. Instead of a fiery explosion of light, it produces broad, dramatic flashes. This design offers a large, open window directly into the heart of the stone. There is nowhere for an inclusion to hide. A small flaw that would be completely camouflaged in a round brilliant becomes glaringly obvious in the placid depths of an emerald cut. This is why attempting to apply the same clarity standards across different shapes is a classic buyer’s mistake.
As you can see, the large, open table and step facets act like panes of glass. Therefore, for step cuts like emerald and asscher shapes, a VS2 grade is often the minimum starting point for ensuring an eye-clean appearance. Pushing down into the SI range is a significant gamble that rarely pays off, as even minor inclusions can disrupt the stone’s clean, geometric beauty.
The following table, based on recommendations from jewelers like industry experts at Gabriel & Co., provides a clear guideline on how clarity requirements change based on a diamond’s shape and its ability to hide flaws.
| Diamond Shape | Minimum Eye-Clean Grade | Ideal Grade |
|---|---|---|
| Emerald/Asscher | VS2 | VS1+ |
| Princess/Radiant | SI1 | VS2 |
| Round/Oval/Cushion | SI1 | VS2-SI1 |
| Pear/Marquise | SI1 | VS2 |
Is an “Eye-Clean” SI2 Diamond a Myth or a Smart Buy?
The SI2 clarity grade is perhaps the most controversial territory in the diamond market. It’s where the promise of incredible value collides with the risk of a visibly flawed stone. So, is finding a beautiful, eye-clean SI2 a savvy move or a fool’s errand? The answer is: it’s a high-risk, high-reward hunt. While it is certainly not a myth, it is a rarity. In fact, industry data suggests that less than 50% of SI2 diamonds are what a discerning buyer would consider truly “eye-clean.”
The key to success in the SI2 bracket lies entirely in the nature and location of the inclusions. A “good” SI2 will have its grade set by transparent or white inclusions (like clouds or feathers) located off-center, near the girdle, where they are easily hidden by prongs and masked by the stone’s brilliance. A “bad” SI2 will have a dark crystal in the center of the table, a large, milky cloud that dulls the entire stone, or a surface-reaching crack that poses a durability risk. Without seeing the stone or at least a high-definition 360-degree video, buying an SI2 blind is an enormous gamble.
Show some patience and you can definitely benefit from finding an SI2 diamond that looks amazing and doesn’t break the bank.
– Diamonds Geek Editorial Team, Diamond Clarity Comparison Guide
However, the potential downside of an SI2 isn’t just about immediate appearance; it can also impact long-term value and liquidity. Many jewelers and online vendors are hesitant to accept lower-clarity diamonds for trade-ins or buybacks, as demand is weaker. This creates a situation where the initial savings can be erased by poor resale value down the line.
Case Study: The Resale Value Trap of an SI2 Diamond
A member on the PriceScope forums shared their experience of buying E-color, SI2 earrings on a salesperson’s advice to prioritize color over clarity. Years later, when they tried to upgrade, two different vendors rejected the earrings for a trade-in. One vendor explicitly stated there is “little demand for low clarity high color diamonds,” offering a very low valuation. The buyer expressed deep regret, concluding they would “never again purchase an SI stone” due to the severely limited resale market, a stark demonstration that initial savings can lead to long-term financial disappointment.
The Error of Accepting an Inclusion on the Table vs the Girdle
If you take away only one lesson, let it be this: a diamond’s clarity grade is a summary, but the inclusion’s “zip code” is the real story. The single biggest mistake a value-focused buyer can make is treating all SI1 diamonds as equal. An SI1 with a flaw hidden near the girdle is a completely different (and far superior) stone than an SI1 with a flaw directly under the table, even though they share the same grade on paper.
Think of the diamond’s face-up view as a target. The bullseye is the table—the large, flat facet on top. This is the main window into the stone, and any imperfection here is in the spotlight. It’s the most visible and unforgiving location. The outer rings of the target are the crown and bezel facets, and finally, the edge is the girdle. An inclusion on or near the girdle is in the best possible location for hiding. It’s often entirely concealed by a prong once the diamond is set, rendering it completely invisible and irrelevant to the stone’s beauty.
This strategic placement has a direct impact on price. A diamond with a centrally located inclusion that is still clean enough to earn a VS2 grade will be more expensive than an SI1 whose flaw is perfectly tucked away at the edge. By prioritizing a stone with well-placed inclusions, you can often drop down a clarity grade (from VS2 to SI1, for example) and save a significant amount of money without any discernible difference in visual appeal. This is the heart of the “intelligent compromise.” You are not buying the certificate; you are buying the view.
Understanding this hierarchy is crucial for any savvy buyer. When analyzing a diamond, your focus should be on finding a stone that falls into the top tiers of this placement strategy:
- Best: Inclusions located on the girdle, especially those that can be completely covered by a setting’s prongs.
- Good: Flaws situated near the pavilion edges, where they are less likely to reflect across the stone.
- Acceptable: Small, transparent inclusions under the crown or bezel facets, where the stone’s brilliance can help mask them.
- Poor: Any inclusion visible at the edge of the table.
- Worst: Any inclusion, especially a dark one, located in the center of the table.
Why Can’t You Drop to SI2 Clarity for Earrings But Not for Rings?
The rules of clarity are not absolute; they are dictated by context. The most important contextual factor is viewing distance. An engagement ring is almost always viewed up close, typically from a distance of 8 to 12 inches. At this range, your eye can pick up fine details, and a small, visible inclusion can become a nagging distraction. The intimacy of a ring demands a higher standard of clarity, making an eye-clean SI1 or VS2 a much safer and more satisfying choice.
Earrings, however, live in a completely different world. They are viewed from a social distance, usually three feet or more. From that far away, the subtle inclusions of an SI1 or even a well-chosen SI2 diamond become completely imperceptible. All that registers is the stone’s overall sparkle and size. You are paying for brilliance and presence, not for microscopic perfection that no one will ever see. This is a critical distinction that allows for a major strategic compromise.
By dropping from the VS range to the SI range for earrings, you can achieve significant cost savings that can be reinvested into better color or, more impactfully, larger carat weight. You get more sparkle and a bigger look for your budget, without any aesthetic trade-off from a practical viewing distance. As leading designers point out, this is the smart way to allocate your budget for pieces that aren’t under constant close-up scrutiny.
For earrings and stacking pieces, SI1 and SI2 work beautifully. Inclusions are hidden or out of view when worn. You get stunning sparkle and save money at the same time.
– Dana Rebecca Designs, Diamond Clarity Guide
The Mistake of Buying “Strong Blue” Fluorescence Without Seeing It First
Diamond fluorescence is one of the most misunderstood and debated characteristics. It refers to the glow a diamond emits when exposed to ultraviolet (UV) light. In most cases—over 95% of the time—fluorescence has no discernible effect on a diamond’s appearance. In some instances, a medium or strong blue fluorescence can even be beneficial, helping to cancel out faint yellow tints in diamonds of H, I, or J color, making them appear whiter and more vibrant.
The mistake is not buying a diamond with fluorescence; the mistake is buying a diamond with Strong Blue fluorescence without seeing it first, especially in a high-color (D-F) stone. In a small percentage of these cases, the strong fluorescence can cause the diamond to take on a “milky,” “oily,” or “hazy” appearance. This effect is caused by the interaction of the UV light with microscopic inclusion particles within the stone, which scatters light and reduces transparency. The result is a diamond that lacks crispness and sparkle, appearing dull and lifeless even under normal lighting conditions.
The market is wary of this potential issue, which is why a diamond with strong blue fluorescence can often be priced at a discount. Furthermore, this perception directly impacts its long-term worth, as analysis shows that strong fluorescence can reduce resale value by 10-15%. While this discount can seem appealing, it’s a gamble. You might get a beautiful stone that appears even whiter, or you might get a “milky” one with compromised brilliance. A GIA study on the topic confirmed that while the negative effect is rare, it is most pronounced in high-color-grade diamonds where the blue glow contrasts with the colorless body of the stone. For the pragmatic buyer, the rule is simple: never buy a D, E, or F color diamond with Strong Blue fluorescence unless you can inspect it in person or via high-quality video to confirm it has no hazy appearance.
Why is a 3-Prong “Martini” Setting Riskier Than a 4-Prong Basket?
The setting you choose for your diamond does more than just hold it in place; it’s a crucial part of its security and overall aesthetic. When it comes to stud earrings, the two most popular choices are the 3-prong “Martini” and the 4-prong “Basket.” While the Martini setting offers a sleek, minimalist look, it comes with a significantly higher structural risk that every buyer should understand.
A 3-prong setting relies on a tripod structure. Like a three-legged stool, if one leg breaks or gets bent, the entire structure fails, and the diamond is lost. A 4-prong setting, on the other hand, is like a four-legged table. If one prong is compromised, the other three can still securely hold the stone in place, giving you time to notice the damage and get it repaired without losing your diamond. This makes the 4-prong basket inherently more secure for daily wear.
Furthermore, a 3-prong setting concentrates all the holding pressure onto just three points on the diamond’s girdle. This increases the risk of chipping, especially if the girdle is thin or has existing inclusions. A 4-prong setting distributes that pressure more evenly, reducing the stress on the stone. While a Martini setting allows the diamond to sit closer to the ear, a basket setting often elevates it slightly, which can improve light entry and enhance sparkle. The trade-off is clear: minimal metal visibility versus maximum security.
This comparative table, drawing on principles outlined by jewelry experts like the team at Gabriel & Co., breaks down the key differences to help you make an informed choice based on your priorities and lifestyle.
| Feature | 3-Prong Martini | 4-Prong Basket |
|---|---|---|
| Structural Stability | Tripod effect – fails if one prong breaks | Table effect – stable even with one broken prong |
| Pressure on Girdle | Concentrated at 3 points (high risk) | Distributed across 4 points (lower risk) |
| Light Performance | Stone sits closer to ear, may block light | Elevated position allows better light entry |
| Visual Metal Coverage | Minimal – very sleek appearance | Slightly more visible metal |
| Best For | Pendants, smaller stones (<0.5ct) | Daily-wear rings, larger stones |
Key Takeaways
- Inclusion Location Over Grade: A diamond’s visual beauty is determined by where a flaw is, not just its official clarity grade. A flaw hidden by a prong is irrelevant.
- Shape Dictates Clarity: The brilliant facets of a round cut are excellent at hiding inclusions, allowing for smart compromises like SI1. The open window of an emerald cut demands a higher clarity like VS2.
- Certification is Non-Negotiable: An independent GIA or IGI report is your only guarantee against over-grading and overpaying. It’s the foundation of a secure and valuable purchase.
Why Should You Demand a GIA or IGI Certificate for Diamonds Over 0.50ct?
In a market filled with subjective opinions and sales pitches, a diamond certificate from a top-tier gemological lab like the Gemological Institute of America (GIA) or the International Gemological Institute (IGI) is your only source of objective truth. For any diamond over 0.50 carats, considering a purchase without one of these reports is not a savvy saving strategy—it’s an unacceptable financial risk. The certificate is your insurance against paying for a quality that simply isn’t there.
The issue lies with inconsistent grading standards. Many retailers use “in-house” appraisals or certificates from less-reputable labs that are known for their “optimistic” grading. A diamond they grade as an “SI1, G color” might be graded by the GIA as a much lower “I1, I color.” This isn’t a minor discrepancy; it can represent a staggering 40-60% difference in actual market value. You think you’re getting a bargain, but you are in fact overpaying significantly for a lower-quality stone.
This financial protection extends directly to the diamond’s long-term value. The diamond market runs on trust, and GIA and IGI are the most trusted names. Because of this, certified diamonds have far greater liquidity and value retention. According to Bloomberg, GIA-certified diamonds can retain up to 2-3 times more resale value than uncertified stones or those with unreliable reports. Demanding a certificate is not about snobbery; it’s about securing your investment and ensuring you can sell or trade the diamond for a fair price in the future.
Case Study: The $3,200 “Bargain” That Wasn’t
A comparative analysis highlighted a real-world example of this risk. A buyer purchased an uncertified diamond for $8,000, believing it was a great deal for its apparent quality. Later, when seeking an insurance appraisal from a certified gemologist, the diamond was professionally evaluated according to GIA standards. Its true market value was determined to be only $4,800. The buyer had unknowingly overpaid by $3,200, a costly lesson in the financial importance of independent, reputable certification.
Now that you are armed with this insider knowledge, your next step is to confidently analyze diamond certificates and high-resolution images, focusing on the critical details that determine true value. Always prioritize a clean table, strategic inclusion placement, and a cut that maximizes brilliance, and you will find a stone that delivers breathtaking beauty without an unnecessary premium.